Jira Service Desk Integration
Integrate Jira Service Desk with Velaro
Integrating with Jira Service Desk requires just a few setup steps. The Jira Service Desk integration uses an RSA key pair as part of it's authentication. After creating your key pair, and creating your application link in Jira, you'll be all set to begin using Jira Service Desk from within Velaro.
Step-by-step guide
- Generate an RSA key pair by either clicking 'Generate Tokens' on the Jira Service Desk integration card with Velaro, or by generating your own by following the instructions listed here ( look for the section titled 'Generate an RSA public/private key pair' )
- If you are generating your own key, you'll need to paste the created Private key into the appropriate field in Velaro.
- Next you'll need to create an application link in Jira.
Configure the client app as a consumer in Jira
- In Jira, click > Applications > Application links.
- In the “Enter the URL of the application you want to link” field, enter https://app.velaro.com, and then click Create new link.
You’ll get a warning that “No response was received from the URL you entered”. Ignore it and click Continue.
On the first screen of the Link applications dialog, enter anything you want in the fields. However, make sure you select the Create incoming link checkbox.
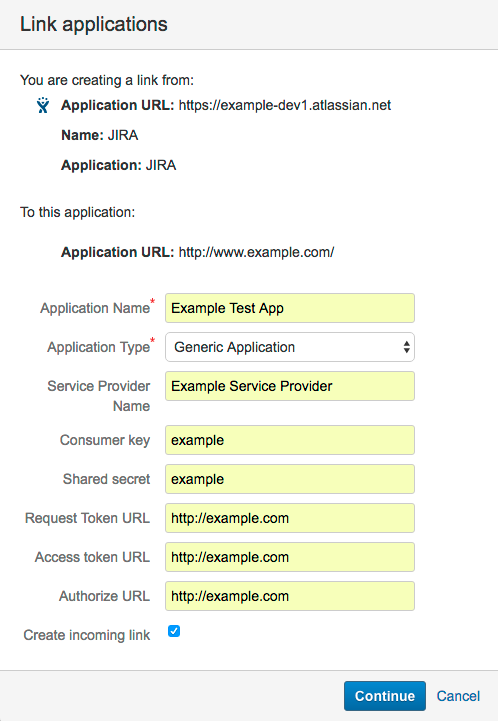
It doesn’t matter what you enter for the client application details (URL, name, type, and so on). This is because we only want to retrieve data from Jira, therefore we only need to set up a one-way (incoming) link from the client to Jira.
On the next screen of the Link applications dialog, enter the consumer details for the sample client:
- Consumer key = VelaroOAuthKey
- Consumer name = Velaro
Public key = Copy the public key that you generated with Velaro, or alternatively from the jira\_publickey.pem file you generated previously and paste it into this field.

Click Continue. You should end up with an application link that looks like this:

- Click the Enable and Save button. Your integration with the Jira Service Desk is now ready to use and will begin displaying for use in the menu on the right side of the engagement screen during chats.
Was this article helpful?